Harbor Freight 39083 QCTP
Replacing the 9x20 10mm Toolpost Stud
with a larger 14mm stud
Harbor Freight 39083 QCTP
Replacing the 9x20 10mm Toolpost Stud
with a larger 14mm stud
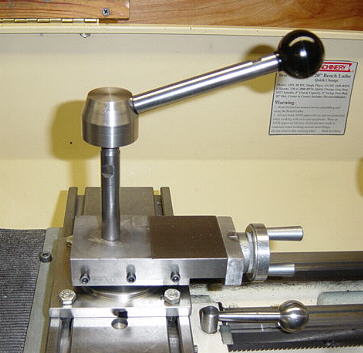
Here's how I replaced the small
stock 9x toolpost stud with a 14 mm stud which was supplied
with the 39083 toolpost. To be
able to use 1/2" tooling I milled the surface of the topslide which
allows the QCTP to sit lower (shown
below). Without this you can use 1/4", 5/16" and 3/8" tooling
but with 1/2" tooling you cannot
adjust the toolholder low enough
Since I do a lot of facing on
my lathe it was important to be able to use the topslide.
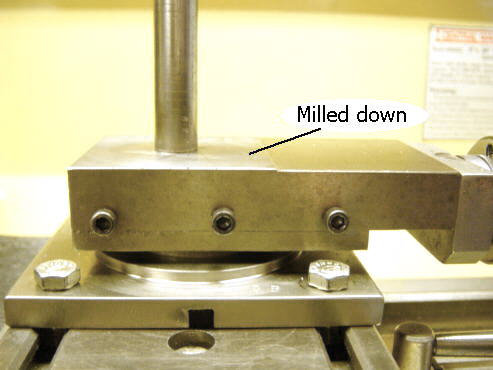
For the 39083 to be able to adjust low enough for 1/2" tooling I removed
the
stock toolpost stud and used the Grizzly mini mill to remove enough
material
to get the adjustment I needed.
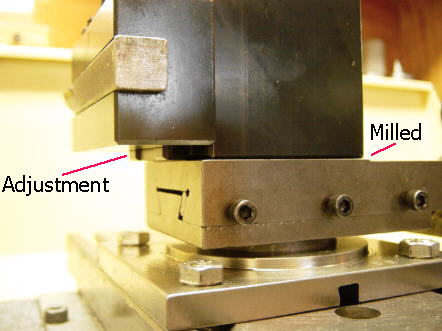
Here I have a 1/2" lathe bit centered to the chuck. With milling the
surface
of the topslide I now have enough adjustment to turn the QCTP without
any problems.
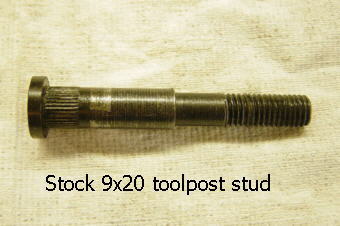
The stock 9x toolpost stud is 10mm on the lower portion
and 8mm on the threaded portion. To remove the stud
you need to remove the topslide and thread a nut onto the threaded
end of the stud to protect the threads. Tap lightly with a hammer
and the stud will push out through the bottom of the topslide.
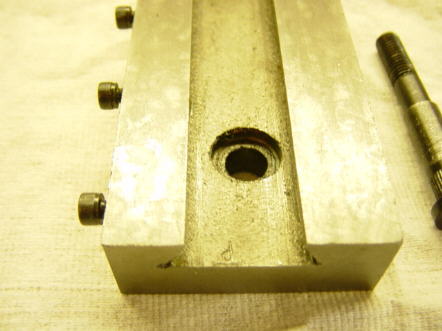
Bottom view of topslide with stud removed
Installing a New 14 mm Stud
Here's how I installed the larger 14mm stud into the topslide of the
9x.
I'm not saying this is the best way , just the way I did it.
I used the supplied 14mm stud that came with the 39083 QCTP. After
milling the top of the topslide
I decided that a two piece stud would be stronger than just tapping threads
into the topslide.
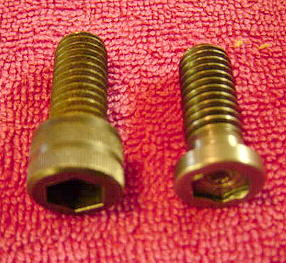
I used a 7/16"-14 tpi x 1" long allen head bolt shown above for the 14mm
toolpost stud to attach
to. I had to cut down the head of the allen head bolt to get clearance
needed. This bolt is inserted
through the bottom of the topslide and the toolpost stud screws onto it.
(The
reason I went with American threads is because I don't have a 14mm tap
or die)
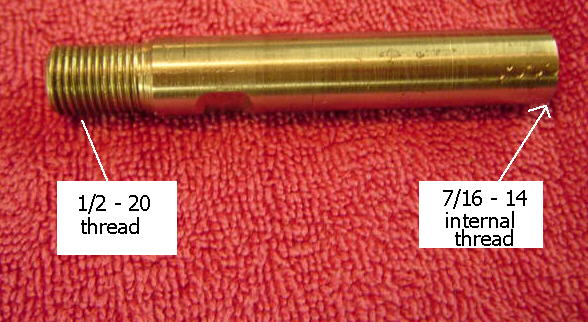
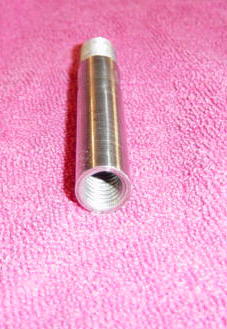
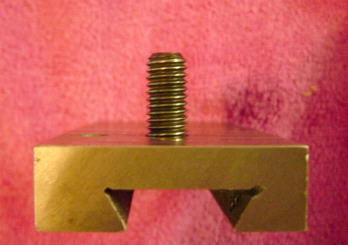
This is the supplied 14 mm stud. I cut it to 3 1/2" long.
Drilled and tapped the one end for a 7/16"-14 tpi internal thread.
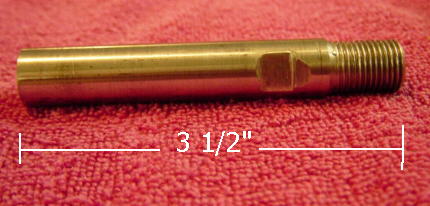
I also used a bench grinder to make two wrench flats for tightening
the
stud to the attaching bolt.
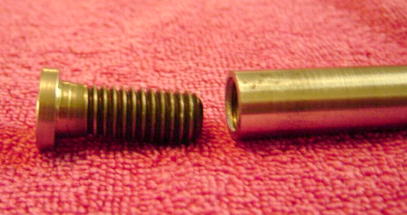
7/16"-14 tpi attaching bolt that will thread into the bottom of the
toolpost stud.
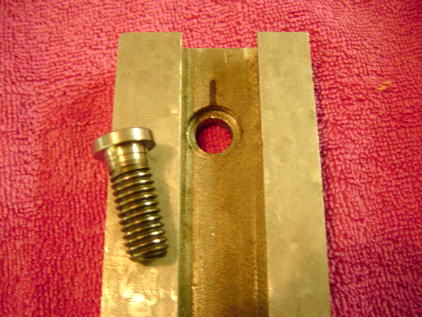
The 7/16"-14 allen head bolt is inserted through the bottom of
the topslide
shown above. I had to drill the existing topslide hole to 7/16".
I also had to turn down the od of the allen head bolt just a little
to
get a "snug fit".
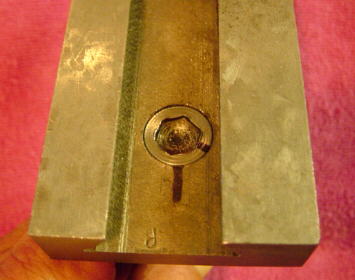
The attaching bolt is in place. The head of the bolt needs to
be close to flush ( it can protrude a little ) so that it does not
interfere the the topslide
when installed.
Here the attaching bolt is in place and the toolpost stud just
screws on.
Completed 14mm stud.
I also just used a handle that I had already built for another QCTP
holder
| 9 x 20 Projects Page | Metal Links | Home |
Comments / Questions / Suggestions or Add Your Link
This information is provided for personal use only.
Copyright 2000 - 2004
Steve Bedair